March 29, 2013

a girl walks into a bar

OK, so it wasn't a bar, but it is still a good story. Two good stories.

First, remember this little gem I found a few weeks back?


Well after several trips back to the store to measure, stare and contemplate


the old girl is at home where she belongs. Our messy home. Sorry for the picture, but that's life.


She fits like a glove and I love her color, finish and pretty much everything about her. Now I just need to rip down that wallpaper. And paint. And get a new mirror. And pillows. And rug. Don't tell the hubs, but we've got another project ahead people.

Story #2 is a story of surprise, drama and intrigue. Or, if you follow me on instagram (follow me here) then it's a story you've already 'heard'.

Last Saturday I was on my way to a little store I love to source a table for a client. But I was early and they weren't open yet so I went next door to the Goodwill to waste time search for good finds.

And as I turned the corner I saw this.


Allow me to read the tag for you. $30 people. (ok, I added the 'people')

I took a picture immediately and then took a seat. Comfy. I lifted the cushions. Clean. I looked for stains. Negative (with the exception of one small crayon mark).

So with all of these good check marks I of course...walked away. I went on my way next store and went about my regularly scheduled errands. But I kept thinking about it. And thinking about it. We need a new couch for our family room. We'd been planning on just getting a slipcovered couch or sectional.

Plans change.

That night I googled to find out what time Goodwill opened and made a plan to go and get my little honey. Even the biggest snow storm we've had in 30 years wouldn't stop me. I piled my girls in the car, drove 10 miles an hour thru some heavy falling snow and slapped down my $30.

Whoop Whoop.

She is now were I put all my best couches, the garage. And my head is spinning about what to do with her. What colors would you use with her? What patterns? I think I feel an inspiration board coming on. Prepare to hear a lot more about this girl over the next few weeks.

Happy Weekend!!

March 27, 2013

favorite room fun

I'm over at Sadie + Stella today talking about my favorite room. (three guess which one it is). Go over and check it out. And I swear this will be the last time we all chat about this room for a while.

Also, be sure to come back on Friday as I have two big things to share. Literally, they are both large in size...and kinda heavy.


March 25, 2013

anatomy of a gallery wall

Happy Monday! I trust that y'all had a splendid weekend. We got pummeled with more snow than we should have for the whole month of December, never mind the fact that it is almost April. Mamma ain't happy. I've got some flip flops burning a hole in my closet. I need spring!

I want to thank all of you for your kind words about the girls' room and all of your great questions. You know how to make a girl blush! There were lots of questions about things on the gallery wall so I thought I would tackle those today.


Here are the specifics on what I included and why.


1. Keep it personal. This is a 'commissioned original'. I wanted something vertical so I asked my uber talented graphic designer bestie to take some lyrics and make them pretty. This is from a song, I Will, by a little band called The Beatles. I sing this each night to the girls (Eve sings along). They are the only ones allowed to hear me sing unless cocktails are involved.

2. Add something with dimension. A craft I did with the girls for Valentine's Day. It is their handy work and they are very proud of it.

3. Humor is important. Let me introduce you to Herb. 'Herbie' to his friends. The hubs got the ceramic dear head for Christmas and as soon as he opened it the girls were smitten. It was Amelia's idea to put Herbie in their room and the hubs was gracious enough to share him. Right now he wears some forsythia for this season I hear we are supposed to get someday called 'spring', but Amelia is on the hunt for the perfect antlers (aka branches) that we can make glittery. Because when you think of a mounted deer head, you think of glitter. At least I do.


4. Art is in the eye of the beholder. An unsolicited piece by Amelia herself. She came into the kitchen one day over the moon to show this off. My favorite is a toss up between the swing on the tree and the paver walk. The girl is a genius obviously.

5. Include something that includes all the colors of your scheme. One of my favorite watercolors from MaiAutumn.

6. More pretty watercolors my parent's gave Eve for her 1st birthday. And yes, the one on the right is in there sideways.


7. You need an 'awww' factor. I keep several pieces of clothes from the early baby days (no matter what my mom might tell you about my sentimentality) and this is one of the few items that both of them wore. This is the hat that both girls had on when they came home from the hospital. How I wish I had better handwriting.

And good gracious, have you ever tried to take a picture of something behind glass?! It isn't pretty, and neither are the pictures.


8. History. The girls' birth announcements. Memories.


9. Add a bit of life. Mean I know as they are no longer alive, but the girls love butterflies. And the yellow ties into the colors of the room. Any random group of things can become cohesive thru color.

10. Break the routine. A vintage oval gold frame from my stash. Something nice and round...or oval, helps to break up all the squares and straight lines.


11. Words to live by. Kate Spade has spoken. Amen Kate.


12. Lessons Learned. I believe I wrote this in sixth grade. There is also an accompanying illustration that severely dates me. Let's just say Benetton was one of the stores featured. They did have great rugbys. I'll keep that little drawing for myself.

13. B. Baumgartner. No expanding on that really.

And yes, I used my tried and true template hanging method and it worked like a charm. Take that plaster.

So that is how I go about picking what little nuggets make it up on the wall. How do you pick what goes on your wall?

March 20, 2013

one room challenge - the reveal

The big day has finally arrived - reveal day! Six weeks, 20 bloggers and one room later, my girls' have a new bedroom and I have a new manicure coming my way (catch up on weeks 1-6 of work on the ORC here).

So in the words of Jennifer Grey in Ferris Bueller, 'let's not ruin this with a lot of talk.' Let's get right to the good stuff.

If you follow me on instagram, then you've been getting little sneak peeks for the past few days. Here is where we started.


And six weeks later, here is where we are today.


Learn more about the silhouettes here.


Learn more about the heart artwork here.


Watercolor by Mai Autumn.


Learn more about the vanity here.


Learn more about the dresser here.


And with that I am spent. Happy but spent.

I want to thank all of you for following along and for your encouraging comments and support. I accept this Oscar on behalf of all the....oh wait, that's a different speech.

If you are new, please come back often as this project has actually triggered several others through out the house (I'm sick, I know). And for you regulars, big hugs and kisses to you.

And a big thanks to my friend Linda for including me. My first two cocktails tonight will be in your honor my dear.

Make sure to check out my fellow ORC ladies to see their beautiful spaces as well. It's like Christmas morning I tell ya.

Now about that cocktail...

March 18, 2013

monday monday

Top 'o the morning to ya. (sorry, I couldn't resist) I trust you had a wonderful weekend and are just pleased as punch for another Monday.

Spring break has begun at my house so I have two girls at home just waiting to be entertained. They will be so excited to hear that they get to spend the day running ORC errands with me. That is what I call spring break fun.

While I give the girls the good news I'll leave you with this picture. A last bit of green to wrap up the holiday weekend.

source
See you back here on Wednesday for the big reveal!!!

March 15, 2013

high gloss dresser tutorial

How is that for a cleaver title post? Yawn.


I thought I would share what I did right, messed up on, and learned from on this old dresser.

For those of you who are new (welcome by the way) and those that might not remember, I got this dresser about a year ago. Long story short - $70 at an estate sale. Raise that roof people.

Here is the way he looked when I met him. The excitement of finding him obviously prevented me from taking a straight picture.


After a year of heavy use as a changing table/dresser it was showing a lot of wear, which I thought was odd. It's not like we beat it or anything. This should have been my first clue as to how refinishing would go.


It is as sturdy as can be and a solid piece of furniture but I was over the white. So let the project begin.

Since it was a balmy 30 degrees outside when I started this (and maybe 38 in the garage) I knew I'd have to take this project inside. So I pulled out the always trusty Citristrip. And good news, they now also have this stuff in a spray can. Wish I had known that before I started.


There is zero smell with this stuff. In fact it smells kind of minty fresh. And it is low VOC, so no worries about harming the littles with my projects.


Put on way more than this picture shows. Like double this amount. I put some on, took this picture and then put on more. More is more with this stuff.

They also recommend you use gloves but I didn't (I live on the edge). I got some on my hands and I've lived to tell the tale.


The directions will tell you to wait 30 minutes, but I could tell by looking at it after a half hour it wasn't ready. I waited two full hours, or basically until it looks like this. The longer you wait, the less muscle you need.


Then you scrape. And if you've been patient, it just lifts right off. Like butta.

As you can tell from this picture my suspicions were right - those little bastards just painted right over the varnished wood. See how dark that wood is? That's layers and layers of stain and varnish. No wonder it chipped so easily.


Enter Easy Liquid Sander Deglosser. This is the product if you have ever said "God I hate sanding. Can I pay someone to do this for me?" No need. Just pour this stuff on and rub it in with a corse lint-free cloth. I used an old wash cloth I had from the dollar store. 


You can see that all the varish didn't come off after the first, or second coat. So later, rinse, repeat. I'm going to find the people that painted this thing and shake them. Or make them watch episodes of 1600 Penn. Yes, that would be much worse.


The good news about this product is that you can do another coat as soon as the first one dries, which is usually about 15 minutes or so. And it's stink free too.


Finally it is ready.

Now I had originally planned to go with oil based porch and floor paint, like Jenny has used, to get the high gloss finish I was after. But remember that whole weather issue? I can't paint outside in 30 degree weather and oil based paint in the house with no windows open is a no no.

Luckily after telling my sob story to the smarty pants at Benjamin Moore, he suggested this.


Benjamin Moore Advance. It is a water based alkyd paint so it acts like an oil based paint (self-leveling, high gloss finish, hard laquer like shell) but without killing many brain cells.

Sold.

After talking about my search for the perfect shade of navy paint, I decided to follow Natalie's lead and went with Old Navy by Benjamin Moore.


I used a roller that my new bestie at Benjamin Moore recommended and it worked like a charm. I was a bit nervous after putting on the first coat though as it wasn't as dark as I wanted. But as the hours passed it got darker and darker.

And yes, I did say hours. A full 24 to be exact. That's how long you have to wait in between coats. And I did four coats. That is four days people. Of painting. And then another four days of drying.

Eight days and nights. Just sitting there, waiting for it to develop its hard candy shell. It was my biggest lesson in patience since having a 'willful child'.


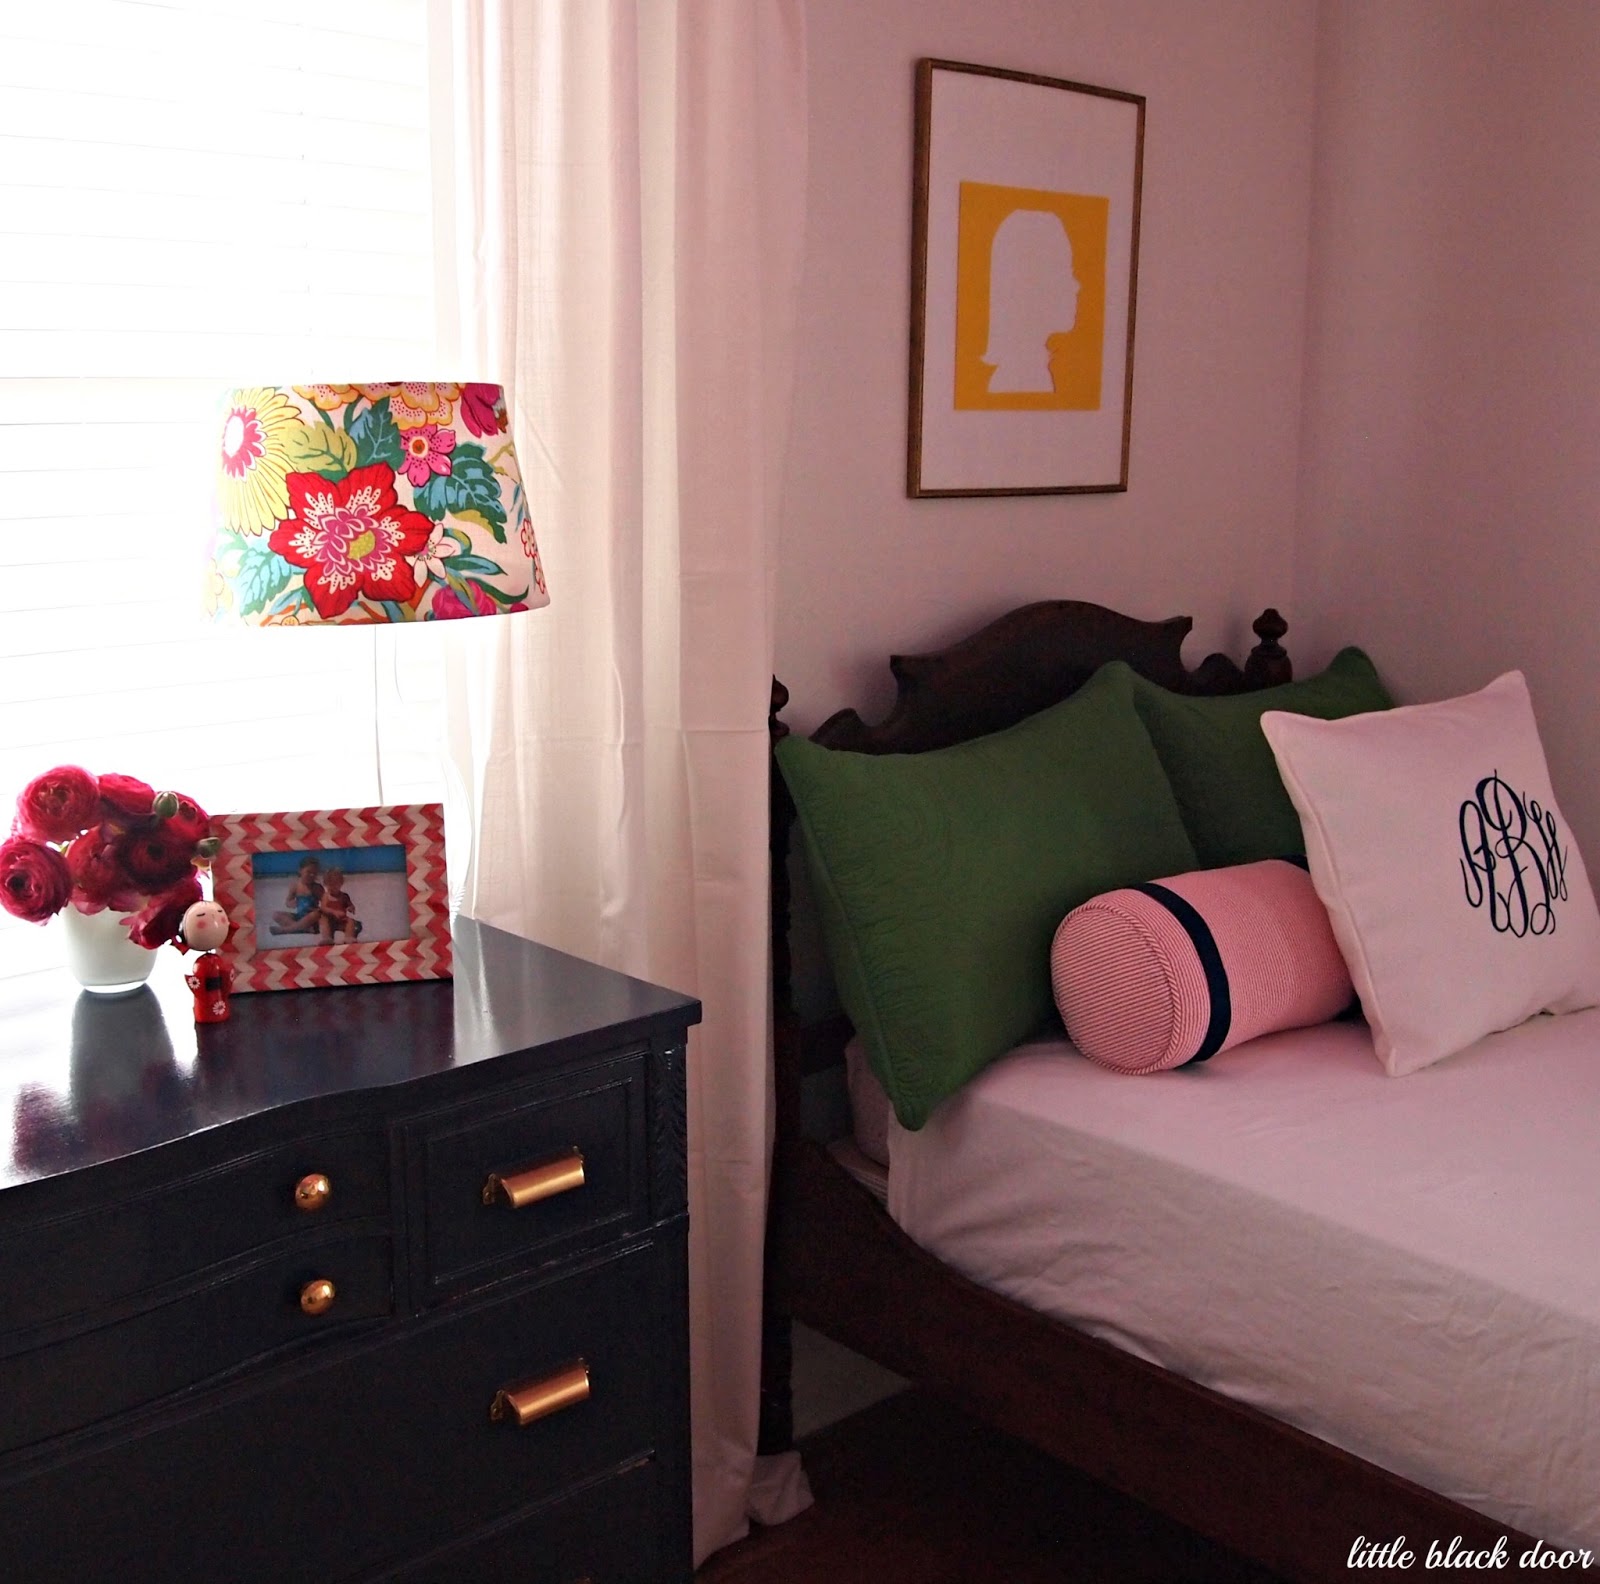
But now he's done and looking good. He makes me smile every time I see him. That deep navy and the little sparkle of his gold handles. He looks like a royal admiral in the navy or something. I think I will call him captain.


Look at that glossy top. You can see the reflection of the ceiling in that thing. Oh captain, you are such a show off.


Pulls courtesy of Martha Stewart at Home Depot. Knobs are the same ones I used on the vanity from Hobby Lobby.


The high gloss on the captain makes him wonderful in person, but a bit hard to photograph.


I'm so protective of him I can't really bring myself to put anything on him. But he is calling to be styled I think.

So the lessons learned: Benjamin Moore Advance is aces, Citristrip is a cinch and Sander Deglosser is a lifesaver. And most importantly, do. not. ever. paint over varnish. Or I will find you.

Painted anything lately? Found a piece of furniture that was keeping secrets from you? Want to come over and help me put the girls room together?

March 13, 2013

one room challenge - week 6

We have arrived at week 6 of the One Room Challenge (see week 1 - 5 here) and I'm ready to put everything together. Mostly. I've only got a few things left to do and then there is that whole putting the room together thing. I'll be busy this weekend. That's for sure.

But enough about what I still have to do, let's see what I got done. I warn you it's not much, but maybe if I talk about it in a really up beat way, it will seem like a bigger deal. Smoke and mirrors people.


The dresser is finally finished and he's been moved in to the room. He was a lesson in patience and has earned his own post. Soon enough dresser. You will get your day.

I also finished the silhouettes to go above the girls' beds which was refreshingly easy. (that passive agressive comment is for you dresser) The hardest part was trying to get Eve to sit still long enough to take the picture. (bribery and a doughnut works wonders)

To get as high contrast in the pictures I set the girls in front of a window and snapped away. Take a look at those yummy cheeks.


I printed them off in black and white, which again helps with the contrast, and then cut my child's sweet little head. Thanks to the contrast, it is very easy to follow the lines.


Then I centered the black and white silhouette on top of the colored paper (pink for Eve and yellow for Amelia) and traced the black and white silhouette with my x-acto knife, leaving me with a simple and colorful silhouette. But when I pulled the finished silhouette away from the paper, I decided I liked the silhouette void even better than the silhouette itself. It acts like a mat and gives the silhouette a bit more presence. Voila. Happy silhouettes. (I'm going to call Guinness as soon as I'm done writing this post to see if I've broken the world record for number of times using 'silhouette' in a single paragraph. Fingers crossed)


And finally, I picked up the cherry on top of two very happy beds.


Now to put it all together. I've only got three items left on the list and #5 has me stumped. Should I go with grosgrain, pom poms or some awesome new trim I don't even know about? What say you?

  1. Come up with functional floor plan
  2. Paint walls/ceiling/trim
  3. Paint dresser (new hardware too) 
  4. Update vanity (maybe some fun color or hardware)
  5. Find curtains and add trim
  6. Add a rug and new bedding 
  7. Hang art and create some personalized pieces PROGRESS
  8. Find/Install new light fixture (buh bye ceiling fan)
  9. Reupholster chair and possibly add comfy floor cushions 
  10. Find/Make lampshade(s) 
I don't know about you, but I'm excited to see how this will turn out. Let's check and see if anyone else will be doing some last minute cramming.

Related Posts Plugin for WordPress, Blogger...
09 10 11 12
Blogging tips