Showing posts with label design board. Show all posts

January 20, 2015

1 room, 10 minds - guest post


Happy faux Monday - I hope those in the US had a great three day weekend. I look at any day that I don't have to pack a lunch as a vacation, so it was aces around here.

Today I'm visiting my dear friend Beth over at designPOST interiors where I'm sharing my plan for her upcoming living room redesign. Little changes here and there can make a big difference. Check it out here and see why I made the changes that I did.

Do you have room in your house that has to serve multiple functions? Ever wanted to make a few changes without redoing everything? Share!

October 6, 2014

family hangout design board and the blue and white bash


Recently I worked with a fun and active family who is lucky enough to have a big, bright walk-out basement in their beautiful home. But with such a big space though, it was hard to decide what to do or where to begin. So we created a plan that would work for a sports loving family, but would still give the style mom was after. A warmer take on a classic blue and white color combo.

The big blank space will be given character with the addition of paneling up three quarters of the wall and built-ins at the end of the room to house the TV, books, etc. Around the corner a bar will be added along with an area for card games and the wall of windows will be given custom roman shades. Much of the hard work will be done by the homeowners over the winter months and I can't wait to see the progress.

I'm happy to share this board today here, and over at The Pink Pagoda's Blue and White bash. Head over to see more blue and white inspiration.

Do you have a room that you don't know what to do with? Email me and let's work together on creating a space your whole family will love.

July 23, 2014

family dinners

My daughter's school has an annual trivia night/auction and this year a Little Black Door design board was up on the auction block. Better than the chopping block, right? After a few rounds a wonderful family won the prize. They are currently on the tail end of a major living room/dining room/kitchen reno and were looking for some help to tie the new open floor plan together.


Working with their beautiful paneled wainscoting, a great collection of black and white photography and their existing dining table, we worked to develop something casual, young and fun. By using upholstered pieces, the space will blend well with the living room which shares the same space and act as a great homework and project area when dinner parties aren't on the schedule. Multi-purpose with style my friends. I can't wait to see it come together.

Do you have a new space to tackle? Email me and we can turn that new room into your favorite room.


June 18, 2014

home office makeover - from the ground up

As promised, I've got updates for you today on the old home office makeover. Which actually is a bit misleading as 'makeover' implies that I'm redoing a space when in reality there was no 'space' here. So I guess creation would be better. But let's be real, 'makeover' sounds more fun.


Here is the inspiration board I'm working off of. For those of you that have followed me on a number of projects, you know that I like to closely follow my design boards (type A much?). No straying for me. Except this time. This is truly an inspiration because as I said at the beginning of this project, I'm trying to work with what I have as much as possible. And sadly, I don't have a spare Madeline Weinrib rug in my stash.

I do have a big black and gold foiled shade that would make a great DIY light. And a desk that I can turn into something pink and fabulous. And an amazing arm chair from an estate sale. You get the picture. So know I'm aiming to replicate this as closely as possible, but changes to the plan are highly possible.


In other news my glorious hubs replaced my window with a brand spanking new one. It is clear, it opens up all the way and it is efficient. What more can one want from a window I ask you. I was prepared to write up how he removed an old junky 60-year-old basement window and replaced it with a new one. But then I sat down to write it and thought, what the hell are you doing? You know nothing about how to replace a window. You were watching Orange is the New Black while he did this. So I will keep it real - I have no idea how he did it. If you really want to know, let me know and maybe I'll have him do a post about it at some point.


So no tutorial, but a great before and after picture instead. Just as good, right?


So I may not have replaced the window, but I did paint the floors. I may have done a bit of spray painting down here in my pre-children days so the floor was even more trashed than a typical basement floor. But thanks to my previous experience painting basement floors (here and here) I wasn't worried. Thankfully I didn't have to remove any carpet strips or tacks this time, all I had to do was do a bit of light sanding and a heavy cleaning.


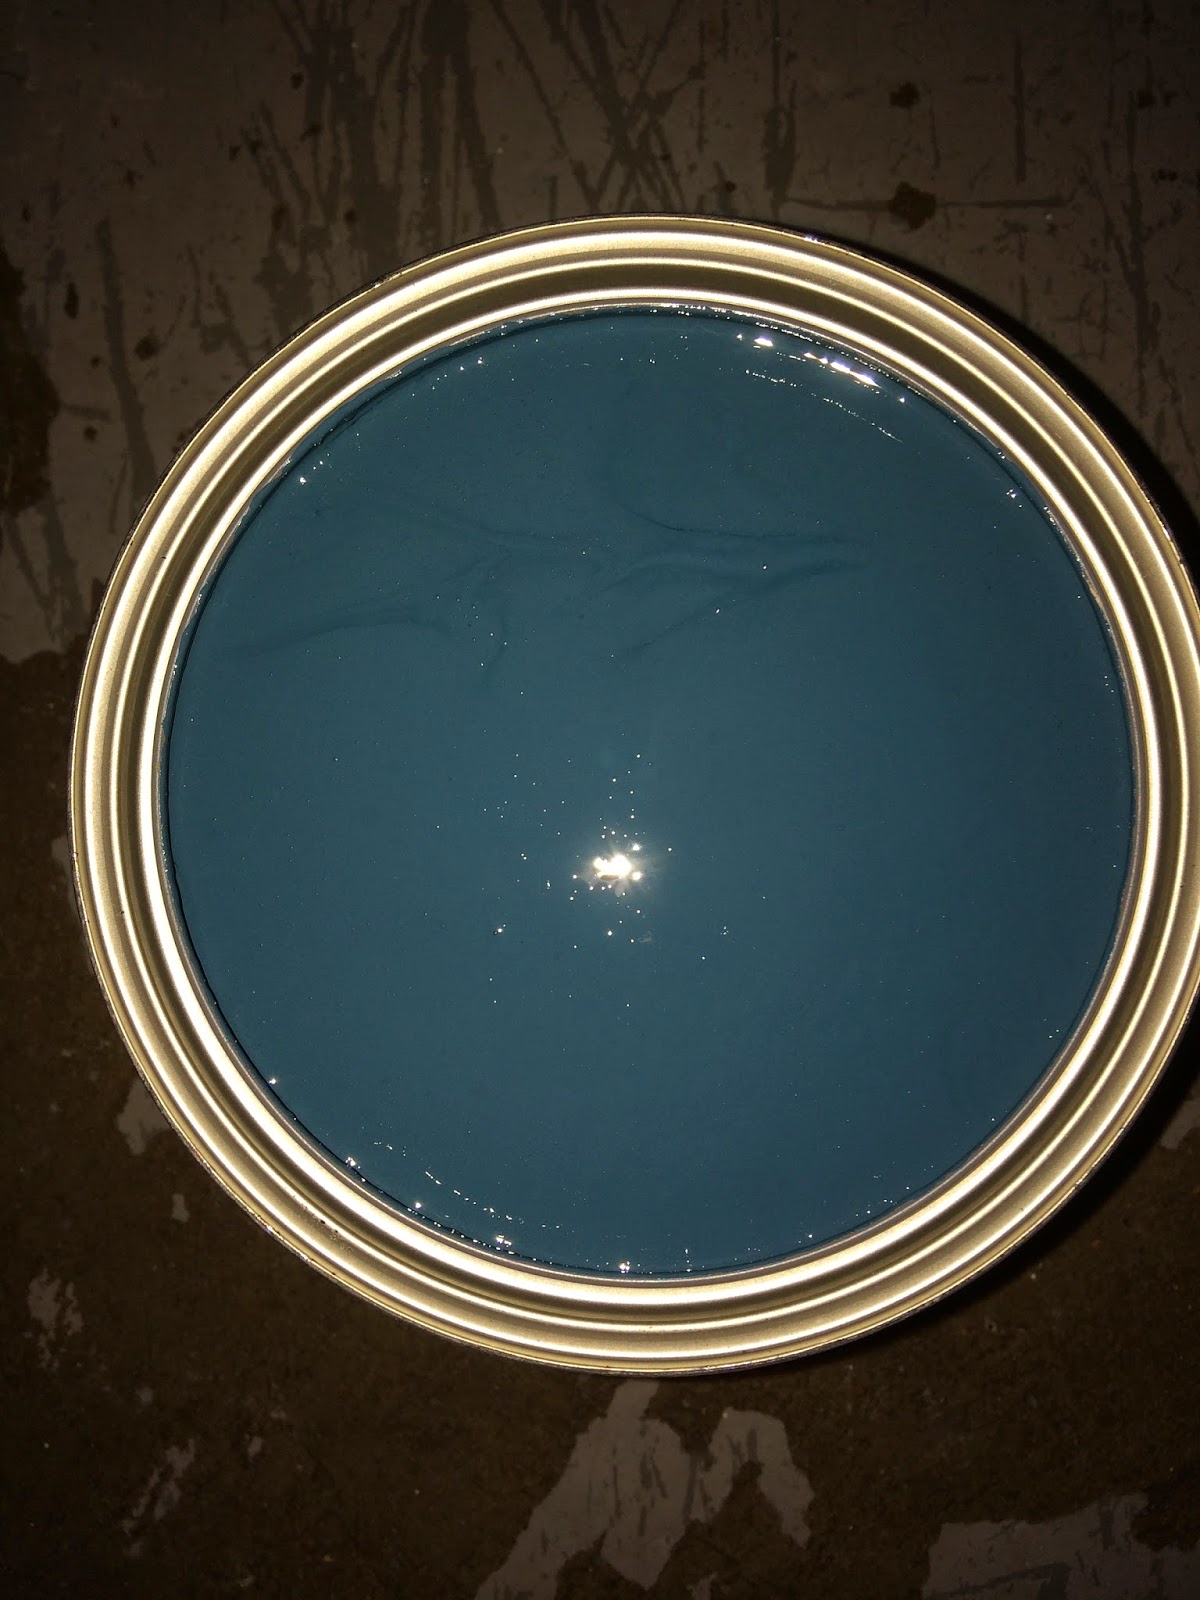
I did mix it up a bit this time and went with Benjamin Moore Porch and Floor paint because I wanted to use this beautiful color. Bermuda Turquoise. I have been dying to use this color for some time and it did not disappoint. It is the most beautiful, deep, rich, color. Evah!


Bam. I pretty much want to kiss my basement floor. How's that for things I'd never thought I'd say? I had to crop this picture as there are some secrets going on over to the right. To be honest there are secrets in plain view over to the left too but consider those a tease. Sweet progress.

Goals for the space:
- brighten it up
- fix and paint the floors
- do something with the exposed ceiling
- replace the window to let in even more light
- girly this place up to create a happy, adult work space
- add more light
- use what you HAVE
- get organized girl!

Now I just need to paint the rest of the desk, figure out storage, lighting and about a million other things. I think I'll go work upstairs on my closet to take my mind off of all this work. Ha!

Do you have a color you've been dying to try? A window you've been dying to replace? A show you've been dying to watch? (Seriously, I need some new Netflix recommendations). 

June 11, 2014

a touch of grey: kitchen e-design


Recently I finished an e-design for a great young couple who just bought a fun fixer upper that they're excited to tackle. They asked me to help them with their kitchen which is quite the pickle. The small square room has THREE doorways, an awkward layout and not a lot of storage.

Luckily they are ready to tackle the reno on their own and after some discussion on closing up one of the doorways and rearranging a few appliances, we have a functional layout that will not only look better, but will work better. Clean and streamlined with a traditional bent to go with their old home. I can't wait to share the progress with y'all.

Do you have a project that you need help with? Email me and we can work together to change your head scratcher into a head turner.

April 2, 2014

one room challenge - the bathroom edition week 1

Spring has sprung, flowers are blooming and the One Room Challenge is back! That's damn good news people!

Twice a year Linda rounds up a group of 20 bloggers to design and put together a room in six weeks. Each Wednesday we all give updates on our progress and six weeks from today (fingers crossed) we unveil some pretty cool spaces. I'm lucky enough to be participating for the third time (see the first two rooms here) and I'm blown away by this group of participants. I mean, c'mon. Just take a look...


Pretty amazing, right?! Needless to say I've got to bring it people. The pressure is on! And what better way to alleviate pressure than to drink take on a huge job in a short time frame? Wait, that doesn't sound right.

No matter, I'm in the thick of it now. So what am I doing?


Welcome to my new home away from home for the next six weeks. Now you could be thinking - "What in the hell? She's doing a horder's bathroom?!" but let me explain.

This is the guest bathroom in my sister's condo (needless to say she doesn't have many guests these days). The whole condo needed A LOT of work when she move in and slowly over time she's been tackling each room as she could. Since she has another bathroom this room became the catch all for supplies, leftovers and castoffs that accumulate when you are under construction.

Well the good news is the rest of her condo has made some big headway. The bad news is that her guest bath looks like that. It is high time girlfriend has a place for guests to splash some cold water on their face after drinking a few of her tasty mojitos.


When we started to think about what was going to happen in this bathroom it took about sixty seconds to come up with blue and white. If y'all think I've got some collections, you should see my sister's place. She has more Chinoiserie in her house than....well anyone else I know (and that's saying a lot).

Realizing that particularly in a bathroom many fixed elements are just that - fixed (unique is not really a word that comes to mind when you think of toilets), we've done lots of hunting to find unique things to make this not just another bathroom. Good things are coming people. Believe it. I'm super excited for this one, it is going to be one major 'after'.

Now that you know my hair-brained scheme, let's see what the others have cookin.


Be sure to check for progress on Instagram, join the linking party tomorrow over at Linda's and come back next week when I hope to show a few less vacuums in the bathroom. That's a good goal for the first week, right?

February 24, 2014

a look at the loo - bathroom reveal

The loo? Yes, I obviously have Downton on the brain (does anyone else think that season went rather quickly?) So as promised I am supplying a good old before and after for your Monday viewing pleasure.

Updates to the bathroom were planned, executed and photographed. Let's take a look.


As I mentioned last week, a recharge for the bathroom that remained untouched for (gasp) almost seven years was long overdue. (Take a look at her major renovation here) Nothing drastic, just new paint, fixtures, shower curtain, towels and accessories. That's how I sell these changes to the hubs by the way - always use the phrase 'nothing drastic'.

To go back to the very beginning, here is what she looked like when we moved in.


And this is what she looked like until very recently.


And here she is in her pretty new outfit.


The space may be small but I'll milk it for all the pictures I can. So here we go.


The most visually appealing, best smelling soap a bathroom could have, courtesy of local favorite K. Hall Designs.


I couldn't find a towel bar that I liked for the right price and the right size, so I trolled the plumbing department at Home Depot and gathered up some lovely copper to make my own towel bar. Tutorial to follow.


The first of many prints I hope to own from Janet Hill Studio.


I got these wonderful white and gold fish hooks a long while back but never found any place to properly 'hook' them. So instead I took out the standard issue knob on the freshly painted medicine cabinet and replaced it with Elton the glamour fish.


Last summer I talked about my obsession with finding a unique shower curtain. Well I never did find one that suited, so I followed the lead of the great Tobi Fairley and had one made.

Thank heavens I have a wonderful aunt who can sew like the wind. She did a beautiful job and because of the custom work I was able to have her make it just the right length so I could take the curtain rod all the way to the ceiling. It is amazing what it has done for the room. The space feels bigger, brighter and well...taller. Imagine that.


On the opposite wall I made the wise decision to ditch the towel bar in favor of hooks. Let's be real, more than one person uses this bathroom so one towel bar wasn't cutting it. Yes we have a hook on the back of the door as well, but this is just so functional, and far more fun.


Benjamin Moore Gray Owl on the walls has done a brilliant job of brightening up the space, bringing out the gray in the marble floor and most importantly - makes the space feel clean and crisp even if the maid doesn't get around to cleaning it for a few days. Of course, not having a maid might have something to do with that.


And there she is in all her clean splendor. The changes weren't major but it has done a tremendous job of making it feel like we have a new room in the house. And she'll hold my spirits up until spring arrives. The moral of the story is small changes = big impact. Every time.

Have you made any small changes lately? Know anyone who will come to clean my bathroom? Is it wrong that I want to hug my shower curtain?

And be sure to come back tomorrow for a grand giveaway!

Linking to The Best of The Nest

February 20, 2014

bathroom refresh - the plan

As I mentioned way back when I've been itching for a little refresh on our (one and only) bathroom for quite a while. We did a gut job on the bathroom when I was pregnant with Amelia (6 years ago) and I've been really happy with it, but lately she was starting to look a bit tired. (the bathroom, not Amelia)

Here she is way back when the blog began in 2011. First blog lesson learned, remove your shower poofs before taking pictures. Duh.


Now there is obviously only so much that can be done is such a small space but I wanted to change what I could without spending much. So paint, and a few new accessories will about cover it.


Be sure to come back on Monday for the big reveal. That will give me time to get that sucker cleaned up and ready for a few photos. And don't forget to come back tomorrow for another great Fess Up Friday.

Have you made any plans to refresh a room in your house?

January 8, 2014

how did i do - 2013 review

So we can't get started on the new year without seeing how I did last year, right? It's always fun to see if your December 2013 self was in tune with your January 2013 self - did I get anything done or not? So with that said, may I have the envelope please.

My 2013 goals were:

1. Entry Refresh - Wahoo! We are off to a good start. It may have taken me a while (I started in June and finished in...October) and I did have to redo the entire stencil, (sometimes I guess it pays to read the directions) but it turned out even better than I had envisioned and now it's fresh and bright and a jolly little welcome to our little home.


2. Sew something. Anything. - Bam! I rocked this one like a hurricane for the One Room Challenge in November. It is amazing what confidence a looming deadline will give you. I had just days to go before the big reveal and I was staring at a pile of fabric and no pillows, so I bit my lip and gave it a go. I will say that the intimidation factor is squarely on that damn machine. Actually sewing a pillow is pretty simple, its that blasted bobbin that gets me. Every. Time.


I even went ahead and made myself some pillows for my bedroom while I was at it. Overachiever.


3. The girls' room. This already feels like a million years ago, but I knocked this one off the list in February/March thanks again to the One Room Challenge. This was one of my favorite projects of the year and I'm happy to say the room still looks largely the same - just with the addition of a thick layer of clothes, toys and naked barbies strewn on the floor.


4. Bathroom Redo. This one is a mixed bag. Yes, I have updated the bathroom. Good homeowner. But I have yet to share the updates. Bad blogger. I did share a very small sneak peak a while back on Instagram but that is it. For shame! I promise a full reveal before we hand out Valentine's.


5. Open my little black door a little more. I just realized how...interesting that line sounds. But anyway, it was about sharing more about other aspects of my work, my life, and just putting myself out there more. And I did work on this. I shared some client projects here, here and here. I started a new series, Fess Up Friday and shared more of my crazy life on Instagram, which I consider like a mini-blog of sorts. I have more plans and more work to do this year, so we will call this one 'under progress'.


So all in all, not so bad for old Elizabeth. And I'll tell you, this has gotten me motivated for 2014. I'm ready to get working! And I'll share those plans tomorrow.

So how about you? How did you do with last years goals? Do you make any years goals for yourself, your business, your home?

December 4, 2013

family room design board

Wednesday is a good day for a show and share, don't you think? Me too. I'm working with an awesome family of five who just moved into their 'this is it' house and they asked me to help with a few rooms.

First up - the family room. Being the smart (and realistic) people that they are they were not going to chuck a perfectly good sectional just because they moved, so we used that as our jumping off point.

They also had the wicker chair and an upholstered arm chair, so we were off to a good start in the furniture department. The armchair is a bit...dated shall we say and the wicker chair could use a spruce, but no sense in throwing out perfectly good furniture if all it needs is a little pick me up. I chose a great faded ikat pattern that will up the fun factor on the old girl and she is already on her way to the upholster for a little nip and tuck. The wicker chair will get a paint job and be as good as new.

The lucite coffee table will keep things airy and open and finding a great old buffet to go below the TV will provide tons of storage for toys, games etc. And can I just say how much I love a client who is game to rock some pink!

Finally we added a big sisal rug that will stand up to some pretty active littles and layered a pattered rug on top to hide the inevitable stains that littles tend to leave behind.


Good news is the buffet has been found, the curtains are already hung and all of the fabric is on its way. This room may just be ready in time for Santa.

Have a room in your house you want to tackle? Getting ready to move into a new house? Contact me for information on local design services as well as e-design. thelittleblackdoor@gmail.com

October 2, 2013

one room challenge - family room week 1

Sound the trumpets and let the stop watch begin, it is One Room Challenge time ladies! Whoop Whoop!

My dear friend Linda asked me to join in the fun for the second time and I am pumped and ready for some design action. Just look who I get to play in the sandbox with this time.
One Room Challenge

I know. Good, right?!

For those of you new to my blog, welcome and I look forward to getting to know you.

And for those of you who are new to this addictive series, here is the gist - 20 bloggers pick a room in their house (or the house of a client) to makeover. Every Wednesday for the next six weeks we will report on our progress, roadblocks and detours, ending with a big reveal full of oohs and aahs.

Six (short) weeks. Funny how six weeks sounds like a nice amount of time, until that clock begins and suddenly it seems like the snap of a finger.

This time I'm tackling our family room.


You might be thinking, "Elizabeth, you fool. That room looks fine to me."

But hold on with the name calling. I have a few good reasons actually.

First, those yellow walls aren't doing anyone any favors. They've been that way for five years now and I'm officially over them. While a happy choice in a lot of spaces, yellow in the basement just makes everything feel a bit jaundicey. (jaundice-like?) It's time for a change.


Then there is this saucy number. I found her at Goodwill for $20. She is in mint condition and after taking her vintage cushions for a spa day at the cleaners she is ready to rock the family (room). And green couch/yellow walls is not a good combo.


And the straw that broke the bloggers back was this little event. We had a really wet spring/summer. Not good. The only thing that prevented tears was the fact that I HATE that carpet. So I'm taking it as a sign of good things to come. I tried to convince the girls that we got water in the basement because they never pick up their toys but they didn't buy it.

So the plan is to change this room entirely. Something fresh, clean and most importantly dry. I'm channeling Anna Spiro and I'm going light, bright and colorful with a capital C.

One Room Challenge Little Black Door

The to do list is long. So very, very long.

- Rip up gross carpet (floor and stairs) and replace flooring
- Paint and plank walls and bookshelves
- Recover estate sale chairs
- Create some sort of art station for the girls
- Paint chairs and table
- Repair and paint coffee table
- Create toy storage that doesn't involve the words 'pink' or 'plastic'
- Get some art on those walls
- Find rugs
- New Lighting

I'll be referring to my Pinterest board on the regular, so feel free to check my organized brainstorm. And if you see a woman wandering around Home Depot with paint in her hair and a list in her hand, that's me. At Home Depot. For the third time this week.

Now let's check in with the others and see what great plans they have for us!


And don't forget that you too can participate in the weekly One Room Challenge Link Party every Thursday at Calling It Home.

So let's start our engines and get to work. Now, who knows the best way to rip up carpet?

May 15, 2013

blue and orange library - before and after

There once was a girl who wanted to switch her living room and dining room. She worked hard and made herself a swanky new dining room, but the living room needed a pick me up. So, she asked her friend for some help. Luckily this girl can DIY with the best of them, and also luckily her friend is me.

My very great friend and her family wanted a cozy space where they could read, do homework, practice the violen and spend hours on Pinterest. And although she knew she wanted to invest in grasscloth, the goal was to work with what she already had, just adding a few things here and there to spruce up the room.

You might remember this little board I did awhile back to get the juices flowing.

Here is the space before. (cute children not included)


And here is the after.

My girl is hardcore. She put up the grasscloth all on her own. Right after she painted that mirror orange and before she put together those IKEA shelves. Unstoppable I tell you.


I love that we talk about the gallery wall and play with some pictures one day, and the next time I talk to her she says, "oh yeah I hung the gallery wall". All I do is plant the seed and she runs with it and makes it look great.


All of the artwork was created by her, in addition to a few pieces by her dad and her kids. They are basically the Partridge family of art.


I love a new tray on an old coffee table. It's almost totally better than a pair of new shoes. That's right, I will always pick a tray over a pair of shoes.


That grasscloth makes all the difference. It makes all of the moldings pop (which she put in during a previous project) and it makes the room so warm. It's like a big huge hug.


The lamp was originally orange but she gave it the gold touch with a can of spray paint.


A collection of gold animals has begun and the gold K looks great against the wallpaper.


The milk glass acquired by the two of us at the single most uncomfortable and slightly bigoted garage sale ever. I'll have to share that story one day.


Yes, this book is upside down. I'm quirky.


And because I hate it when magazines talk about a space and don't show a picture of it, here is her wonderful dining room. Good, right?

So that is the story of the girl who switched her living room and dining room and ended up with a great family space.

How about you? Have you switched rooms in your house before? Made some changes to a room that wasn't working for you?
Related Posts Plugin for WordPress, Blogger...
09 10 11 12
Blogging tips