Showing posts with label entry. Show all posts

August 20, 2014

glass front doors - don't be afraid

About a year after we moved into our house I was locking the front door when the door knob literally fell thru the door. It was original to the house (70+ years old) and it had rotted from the inside out. Since our house is old and nothing is standard we had to get a custom door so I decided to get exactly what I wanted. I believe my door salesmen's exact words were "You sure lady?!" when I told him. But I've been thrilled with our choice. This door lets a lot of light into what would otherwise be a dark corner of the house and I love the character it adds inside and out.


We get a lot of complements on our front door. But those complements are often followed by questions. Don't you feel exposed? Aren't you worried about your privacy? How do you check to see who is at the door?

via
While I understand the curiosity, I always find these questions a bit odd. No one cares what is going on inside my house. I have yet to find people standing in my yard trying to peek into my windows.

via

Anyone who would try to break into my house isn't going to case the joint by looking thru the front door first. I'm pretty sure most thieves are a bit sneakier than that. And nosy neighbors are more concerned about what is happening in other rooms than the entry.

via

There is a house not far from us with beautiful windows, great exposure and fabulous plantation shutters in every single window that are. never. open. Why?? I don't understand. Let in that beautiful light people!!

via

And who are all of these people that are coming to your door? In the whole time I've lived here I can honestly think of only four times a stranger knocked on my door unannounced.

via
As for people you know dropping by unannounced, the car in the driveway is going to give me away so I don't have a lot of places to hide, glass door or not.

via
It is one of the best ways to get a double bang for your buck - big curb appeal boost and indoor light and style queen. What is not to love?

via
So if you are considering it, or at all on the fence, I am here to tell you to go for it. You won't be sorry.


And remember, no matter how much glass we have, we still open it up to peek around the corner.

What do you think? Could you have a glass front door? Are you worried about privacy?

January 27, 2014

no shoes no service

During our most recent snow storm I laid down a towel just beyond the rug in the entry to catch the extra wet boots, shoes, gloves, hats and whatever other crap is needed to deal with this horrible weather.

And then yesterday I finally got around to cleaning it up, putting things away and picking up that filthy towel. (It's amazing what a random 50 degree day can do for your mental wellbeing.) That towel was so disgusting I made a new house rule right then and there - no shoes in the house.


The girls and I are pretty good about taking our shoes off as soon as we walk in the door and sticking them in the black and white basket under our bench. But I'm going to start being that vigilant about everyone who comes in the house.

House and Home

When I lived "up north" (Iowa and Chicago) everyone took their shoes off when they walked into someone's house, especially in the winter. No questions asked.


However, I know for some it isn't a big deal at all. And others even consider it rude.


Apartment Therapy

Would you ask people to remove their shoes when they come to your home? How do you do it without sounding bitchy anal inhospitable?


Muskoka Living
Homedit

What about your house? Are you a no-shoes home? Do you make sure to wear good socks when you go over to someone's house...just in case?

January 8, 2014

how did i do - 2013 review

So we can't get started on the new year without seeing how I did last year, right? It's always fun to see if your December 2013 self was in tune with your January 2013 self - did I get anything done or not? So with that said, may I have the envelope please.

My 2013 goals were:

1. Entry Refresh - Wahoo! We are off to a good start. It may have taken me a while (I started in June and finished in...October) and I did have to redo the entire stencil, (sometimes I guess it pays to read the directions) but it turned out even better than I had envisioned and now it's fresh and bright and a jolly little welcome to our little home.


2. Sew something. Anything. - Bam! I rocked this one like a hurricane for the One Room Challenge in November. It is amazing what confidence a looming deadline will give you. I had just days to go before the big reveal and I was staring at a pile of fabric and no pillows, so I bit my lip and gave it a go. I will say that the intimidation factor is squarely on that damn machine. Actually sewing a pillow is pretty simple, its that blasted bobbin that gets me. Every. Time.


I even went ahead and made myself some pillows for my bedroom while I was at it. Overachiever.


3. The girls' room. This already feels like a million years ago, but I knocked this one off the list in February/March thanks again to the One Room Challenge. This was one of my favorite projects of the year and I'm happy to say the room still looks largely the same - just with the addition of a thick layer of clothes, toys and naked barbies strewn on the floor.


4. Bathroom Redo. This one is a mixed bag. Yes, I have updated the bathroom. Good homeowner. But I have yet to share the updates. Bad blogger. I did share a very small sneak peak a while back on Instagram but that is it. For shame! I promise a full reveal before we hand out Valentine's.


5. Open my little black door a little more. I just realized how...interesting that line sounds. But anyway, it was about sharing more about other aspects of my work, my life, and just putting myself out there more. And I did work on this. I shared some client projects here, here and here. I started a new series, Fess Up Friday and shared more of my crazy life on Instagram, which I consider like a mini-blog of sorts. I have more plans and more work to do this year, so we will call this one 'under progress'.


So all in all, not so bad for old Elizabeth. And I'll tell you, this has gotten me motivated for 2014. I'm ready to get working! And I'll share those plans tomorrow.

So how about you? How did you do with last years goals? Do you make any years goals for yourself, your business, your home?

October 14, 2013

freshening the foyer - finale

Morning sunshines! I hope you all had a great weekend. I have a long overdue update on the entry for you. So let's jump in, shall we?

To jog your memory, here is where I left the space back in June. Yes, I said June. (read parts 1 and 2 of the entry makeover here and here)


We all agreed at the time that the placeholder mirror wasn't doing anyone any favors and it didn't really add anything. I'm trying me best to be a thoughtful and slow caretaker of this little house and wait for the right thing rather than just buying the closest thing. I looked on Craigslist, thrift stores and antique shops and found a big fat nothing.


Then I went on vacation and made a stop in one of my favorite antique stores in Sarasota. And this little gem was just waiting for me in the corner. A cool shape and the right size to not dwarf the bench or the narrow wall where it would sit. The man at the shop told me he had just bought it at an estate sale at the oldest house in Sarasota (which is why he hadn't hung it up yet) but he is also quite a shyster so who knows what the real story is.

At any rate it is the same store I got my coffee table and one of the raspberry dressers in my living room from, and I like that I get so many of my orphans from the same spot.

I've drifted off topic..where was I? Ah yes, the mirror. So the paint job on the mirror was not in good shape and it wasn't the right color. So I sprayed it black and bam - I'm calling this entry done.


I had originally wanted to add some sconces to either side of the mirror but all the ones I liked were too wide for the space. Then my genius mother suggested we go to a shop we are lucky enough to have downtown that sells nothing but vintage china.


We found this great pattern with all the colors of the entry and the living room. Love that pattern and that woman.


Feels good to have that wrapped up.

Have you held out for the right piece before? Has it taken forever to find something to fit in a spot in your house? Want to borrow my mom for her problem-solving skills? She's good.

June 28, 2013

freshening the foyer - part 2

Previously, on Freshening the Foyer...


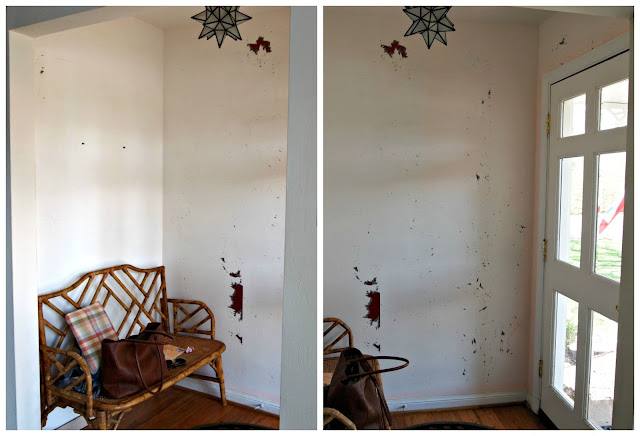
We were left with a blank space


and a can of this.

Specifically, Lucky Shamrock by Benjamin Moore. I have a lot of blue in my house and I really do love blue. But I didn't want to become one big blue house. So what goes with blue? What's welcoming and cheery? What would I want to see when I walk in the house everyday? 


Green.

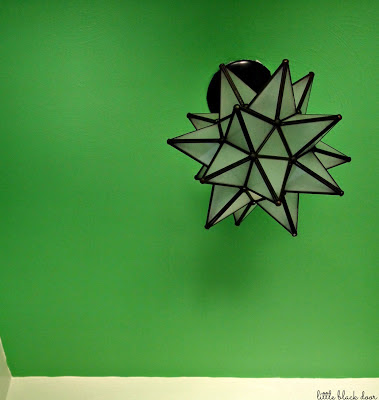
And you all know how I like a good lookin' ceiling (like here and here) so I took that paint up north. Happy green ceiling - complete. Now for the walls.

My ultimate dream would be some Anna Spiro wallpaper but for now that isn't in the budget. So I went with this stencil from Cutting Edge Stencils thanks to a Sadie + Stella discount code a while back. (Thanks Lindsay)


And here is where this little spruce up went off the tracks a bit. I got the stencil, I was excited to use it and the walls were painted and ready. The hubs and I skimmed thru the directions (first mistake) and got to work.


And ended up with this. Ruh roh.

How's this for real life DIY? They don't always go so smoothly, am I right? I blame the little dots in the stencil. They threw us off some how. To be honest, I don't know what happened. The whole process went so fast (which I was rather surprised about) we didn't realize it until we stepped back to admire our finished work.

Major let down.

This all happened right before the party, of course, so it was a good lesson in letting things go. There was no time to fix it and I just didn't have the mental fortitude to make it happen.


So this is how it looked for a few weeks. And it drove me bonkers. The stencil is on crack, the mirror doesn't play well with the bench and its hung too high. And the trim still needs to be painted. Calgon, take me away.


Finally I psyched myself up to try this again. I repainted the whole space (thank god it is small) and after playing with the stencil BEFORE painting, revolutionary I know, I figured out what I needed to do.

So learn from my mistakes.


This is not something you can rush thru, even if it may seem straightforward. You will need to do one sheet and step back to check your work. Then place the sheet in the next spot and step back and check your work. Then roll the next sheet and, you guessed it, step back and check your work.


You will want to go over the stencil several times with your roller. Don't. It just makes a mess. And always roll in the one direction. Never back and forth or you will just end up with a big smeared blob.


Play with the amount of paint on your roller a bit before starting. The key is to find the perfect combo of the right amount of paint and the right amount of pressure so you can get the stencil on in one roll.


Much better.


Now all that is left is some styling, finding some sconces and figuring out a solution for the mirror. The round one that was there originally just didn't work.

This mirror is from the family room and I like it's size but I don't like the pine with the bench. But this mirror is from my parents and it is certainly a 'paint it and die' piece.


So my best girl Linda is helping me to scour Craigslist and I've already got a few options. With her mad skills, I bet I'll find something in no time. What kind of mirror would you add?

Look forward to the next installment of Freshening the Foyer to find out how this all ends. Will I get the trim painted? Will I find a mirror? Will I ever clean that floor properly? Too much excitement, I know.

And don't forget Google Reader is donezo on July 1. Have no fear though, you can continue to follow my sparkling personality and quick wit on Bloglovin. Find out how to import your list from Google Reader here.

Happy Day!

June 21, 2013

freshening the foyer - part 1

Thanks everyone for your great potty training tips and ideas. Today the fun begins, so I'll keep y'all posted.

A few years into our marriage, I gave my husband a valuable little nugget of truth that has helped him to accept deal with my never ending project list - "by the time I mention something to you, know that I've already been debating the idea in my head for quite some time." I know, poetry right?

So when I told him a few weeks back that I had plans to overhall the foyer, his response was music to my ears -"Cool". He's a good egg.


Now I may get some slack for this because this little image is pinned quite a bit, but I'm tired of it. That wallpaper was one of the first projects we (aka the hubs and my dad) tackled in the house. Seven years ago. It is faded, scratched and is starting to come off on the corners.

Also, as much as I like the yellow table on its own, I was never in love with it with the wallpaper. It was all a bit too ketchup and mustard for me.

And the third strike, as great as this layout is in theory it isn't real life. We don't come in the door and put our mail and keys down. We come inside and take off our shoes. And 50% of the residents of this little cottage need to sit down and take several minutes to get those little shoes on and off. So its time to pull a Dr. Phil and 'get real' - we need a spot for all of this action.


Enter my new favorite. You may remember I was fortunate to snag my beauty of a bench a while back and it fits perfectly in the foyer. But the wallpaper isn't doing it any favors. This bench deserves a snazzy space.


So the wallpaper came down.


No one in this house is exempt from a good DIY.


Thanks to plaster walls, I was able to remove all of that wallpaper, all of it, with just my hands. No tools needed. See, I told you it was ready to come down. An important tip in removing wallpaper though, once the paper is off the wall, don't think you are finished. You still need to give the wall a good scrub with a wet sponge to get off all of the glue that remains on the wall. That sponge also helped to loosen up those pesky little pieces that hung on.

After about an hour before bed and then an hour or so the next morning I had a blank palette. I'm already in love with how much brighter and bigger the space feels. And let's face it, anything I can do to make this tiny space feel bigger is a thumbs up. So I painted the entry the same color as the living room (Arrowroot by Pratt & Lambert) to help with that bigger space feeling trick.


But fear not, I didn't just leave it that way. You know I can't go without a good dose of color. Next week we'll see where that color went and what to do when DIY goes wrong. (how's that for a tease?)

What are your plans for the weekend? Any DIY projects planned? Any plans to fix a DIY project?
Related Posts Plugin for WordPress, Blogger...
09 10 11 12
Blogging tips